Output Devices
Like the previous week with the Quarantine is gonna be a "stay at home" assignement work.
For this i first look what i can use in output devices to progress in my Final project.
let's go for some cheap DIY for create a prototype of my Stepper & LED Display.
RGB LED aka "NeoPixel"
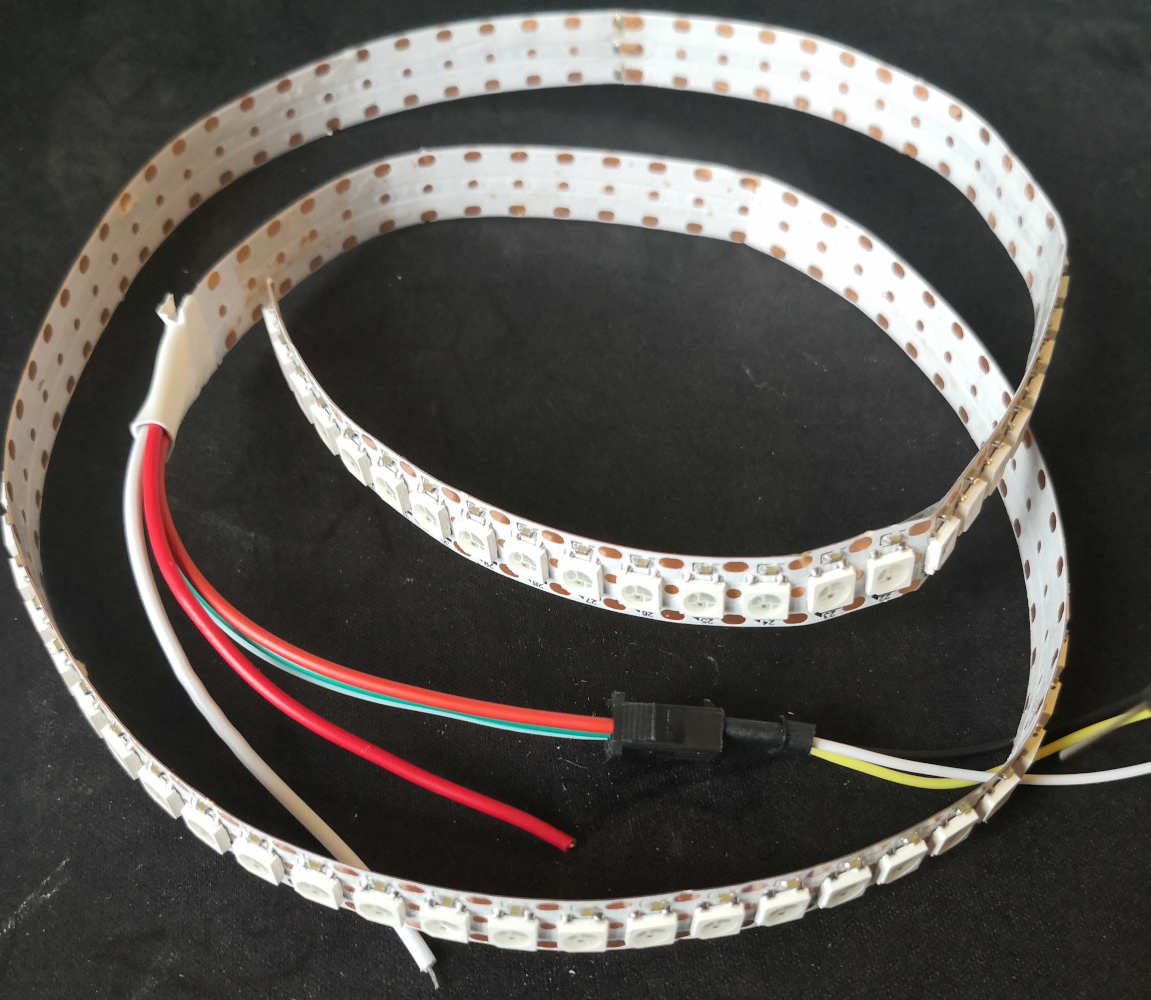
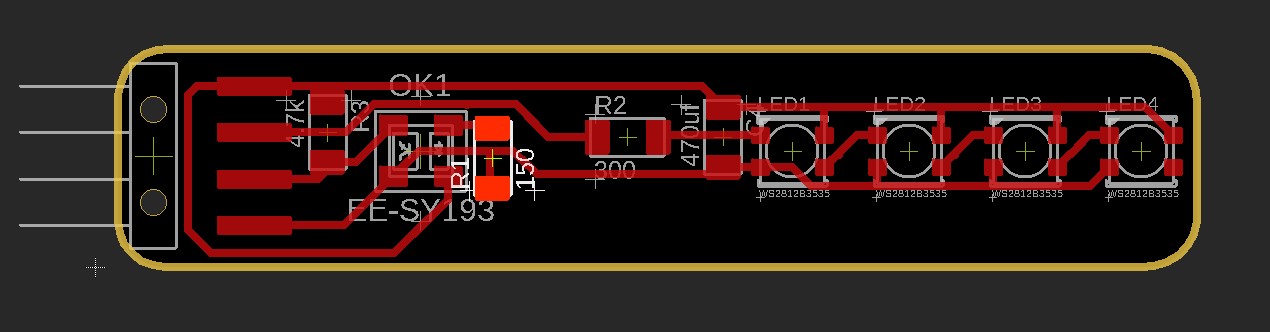
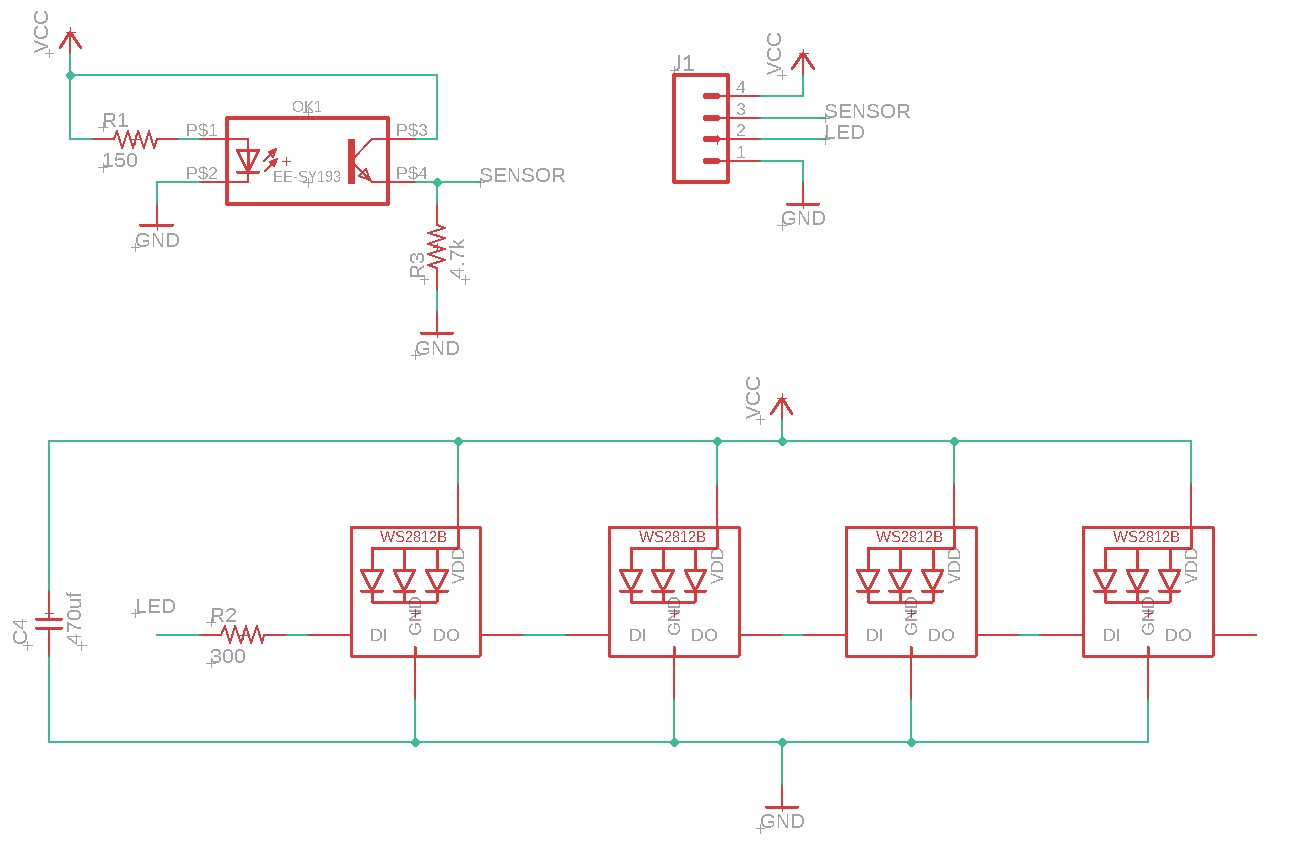
I start this assignement by working on the LED part of my display, for this i use a strip of WS2812B RGB led a great advantage of this LED devices is the already integrated intelligent control. You need just one datapin to drive a full strip of them.
To programme the Strip with arduino, you could find two great libraries
After looking a lot of different exemple & read the different feature of each librarys, i can make my opinions.For me:
- The Adafruit_NeoPixel library is a really nice & lightweight library for simple use of RGB LEDs pixel.
- The FastLED one is better if you want to make more complexe lightning or animation.
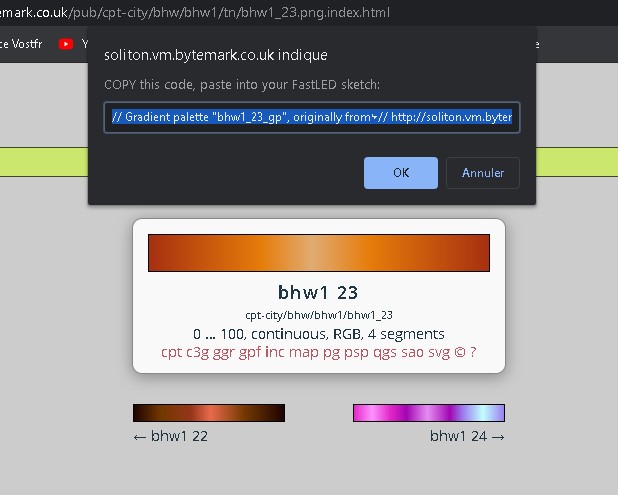
This tool give us the capacity of use a full color palette code directly taken on a artistic color gradients data base named cpt-city
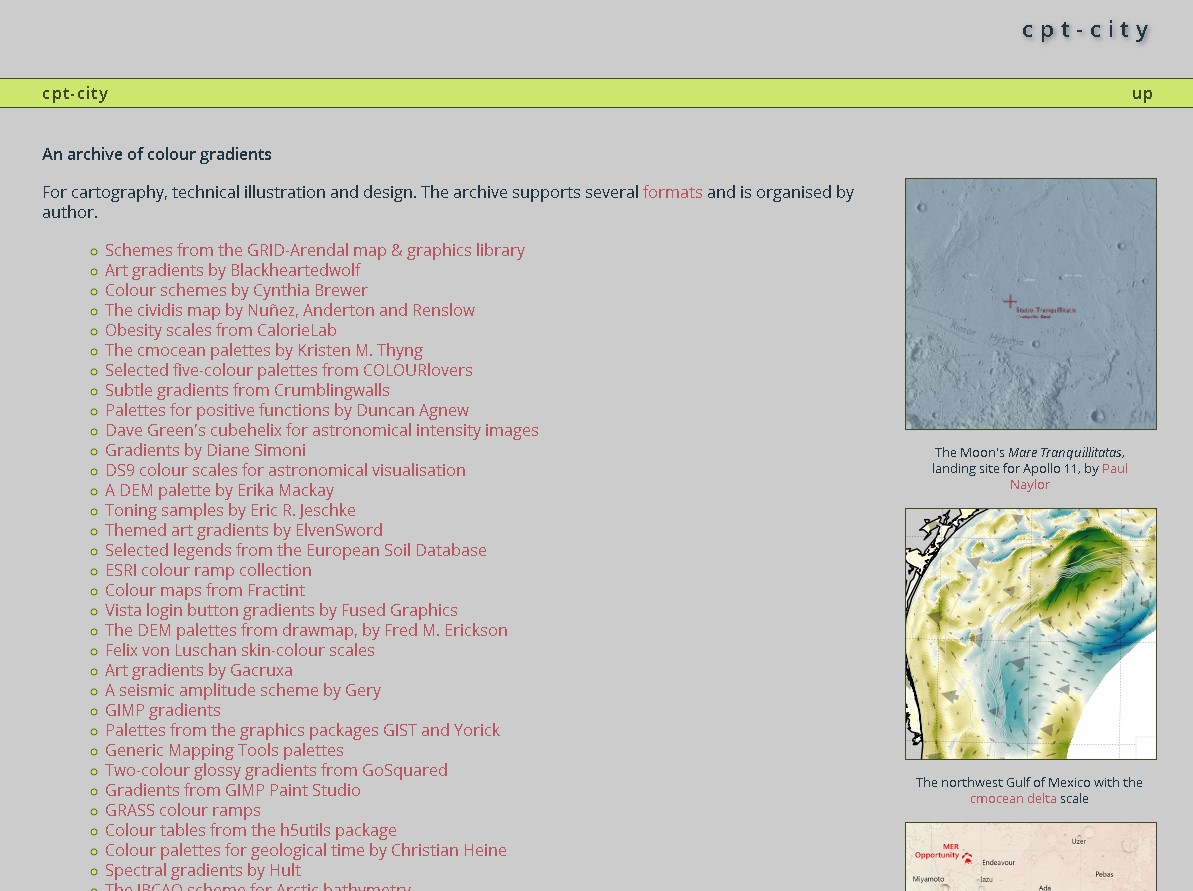
Full Tuto HERE
Stepper Motor
In my project the second party of my display is a plexyglass gear moved by a stepper motor.
For this i chose to work with a 28BYJ-48 stepper motor. It's a small & cheap 5V stepper motor eassyly controlled
with a ULN2003 darlington transistor.
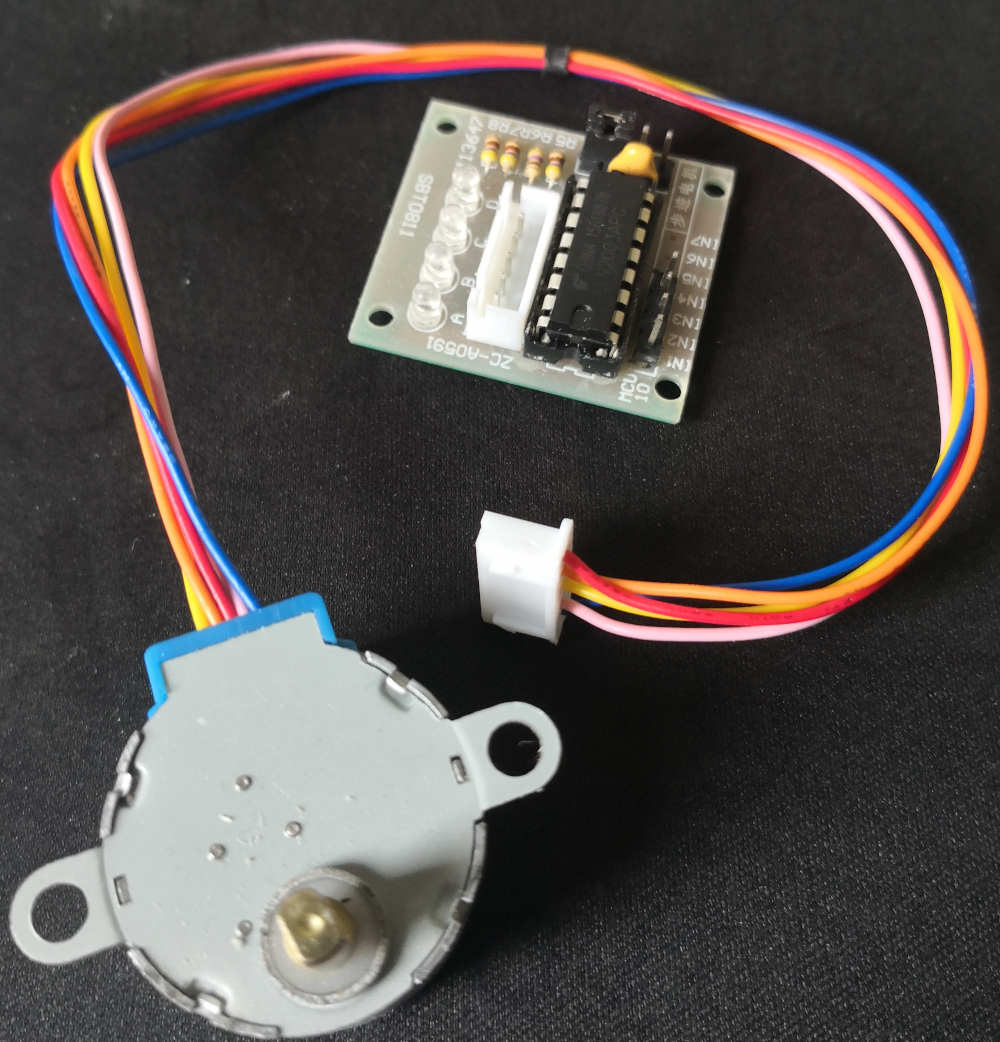
And perfect i have one on my drawer ^^.
For programme this one i chose to work with the AccelStepper library.
This library permit easy control on the stepper with acceleration & deceleration.
I start by following the really nice Makerguides tutorial but my stepper don't want to move....
I looking why my motor is not working & see the 28BYJ-48 i have is not a v one but a 12V.
For make it run i have to use a external supply, i use a old supply i have repared from trash but for more precision on the power delivery i coupled it with my multimeter.
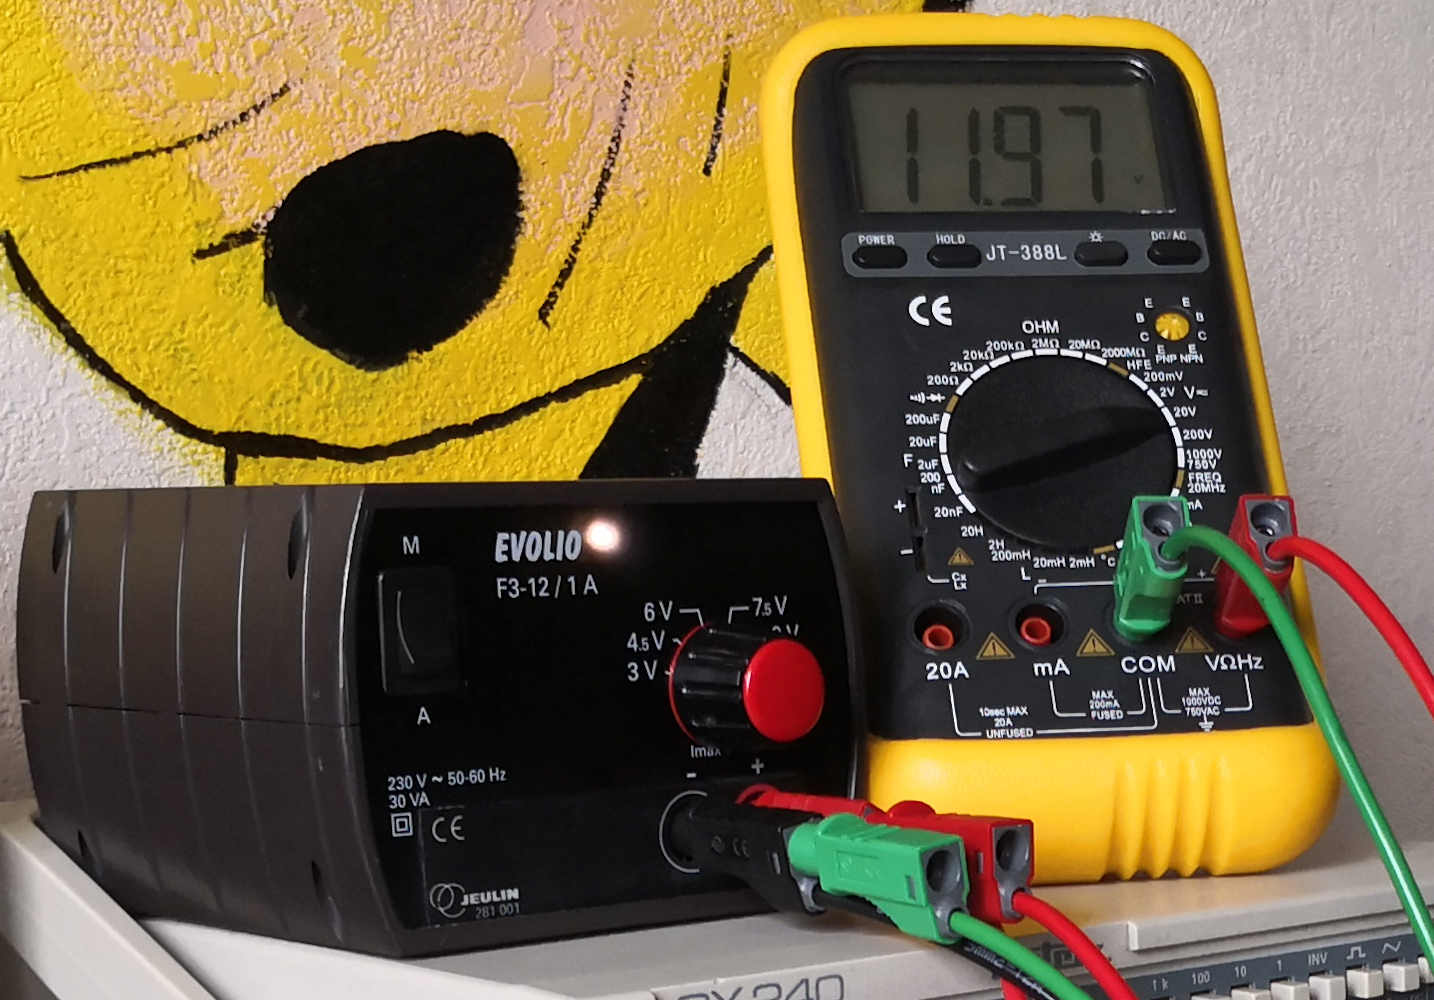
And here we go it's work.
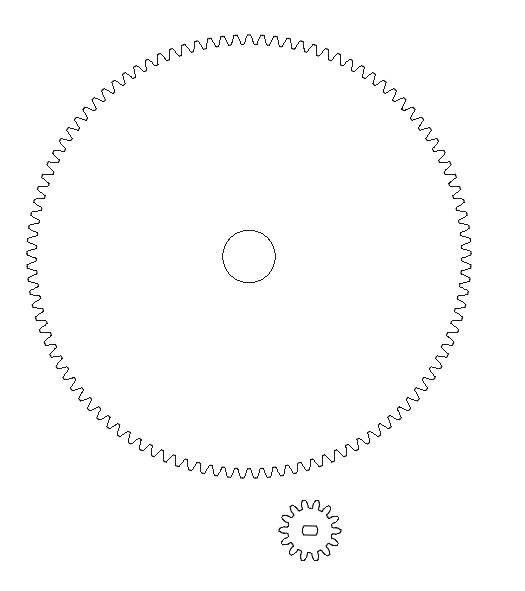
For simulate my Final Display i don't have at home a lasercutter & plexyglass, don't worry let's go have some fun.
I print my two gears from fusion & glued the print on a old cardboard calendar & cut it.

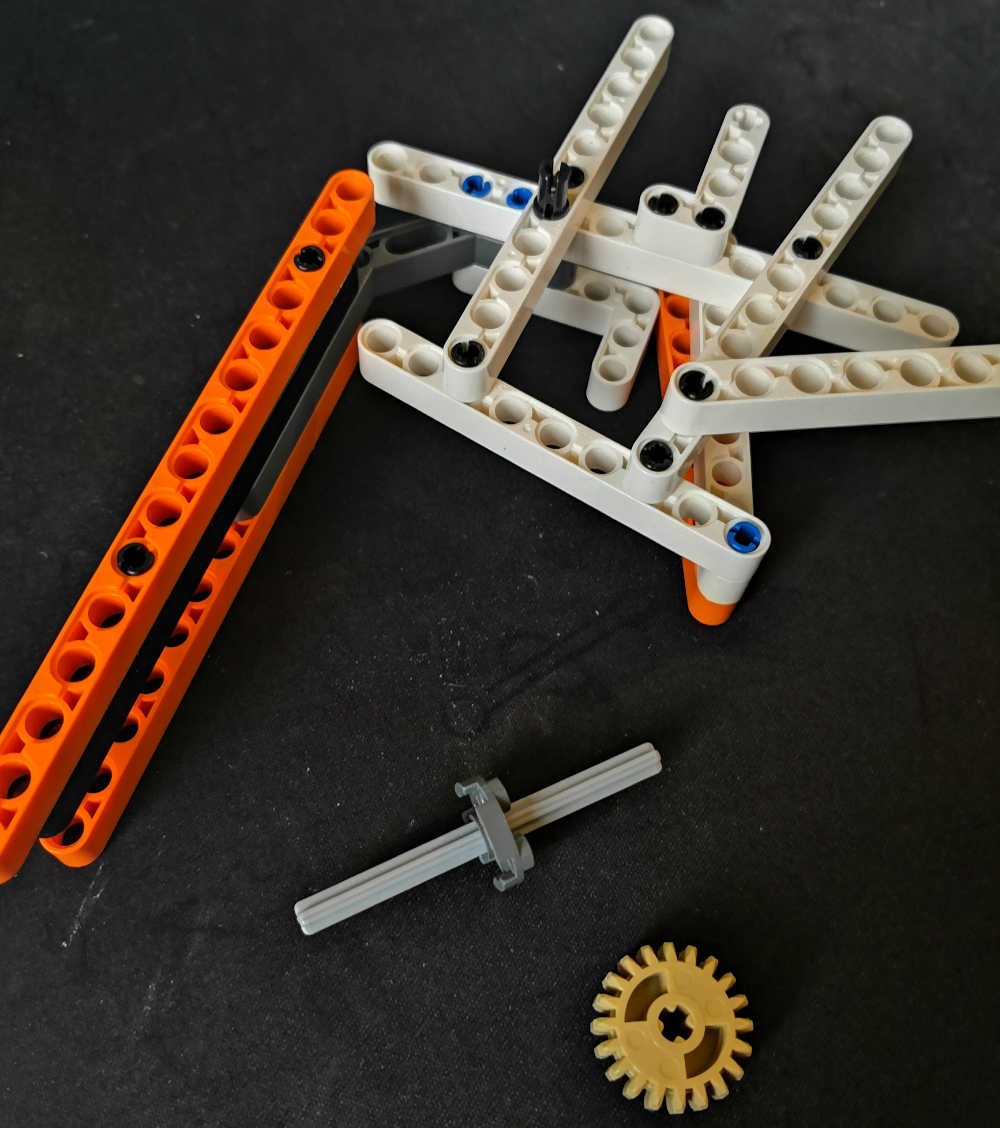
After i going to my son room to borow some lego for make a structure. It's not really a precise work but it's work ^^.
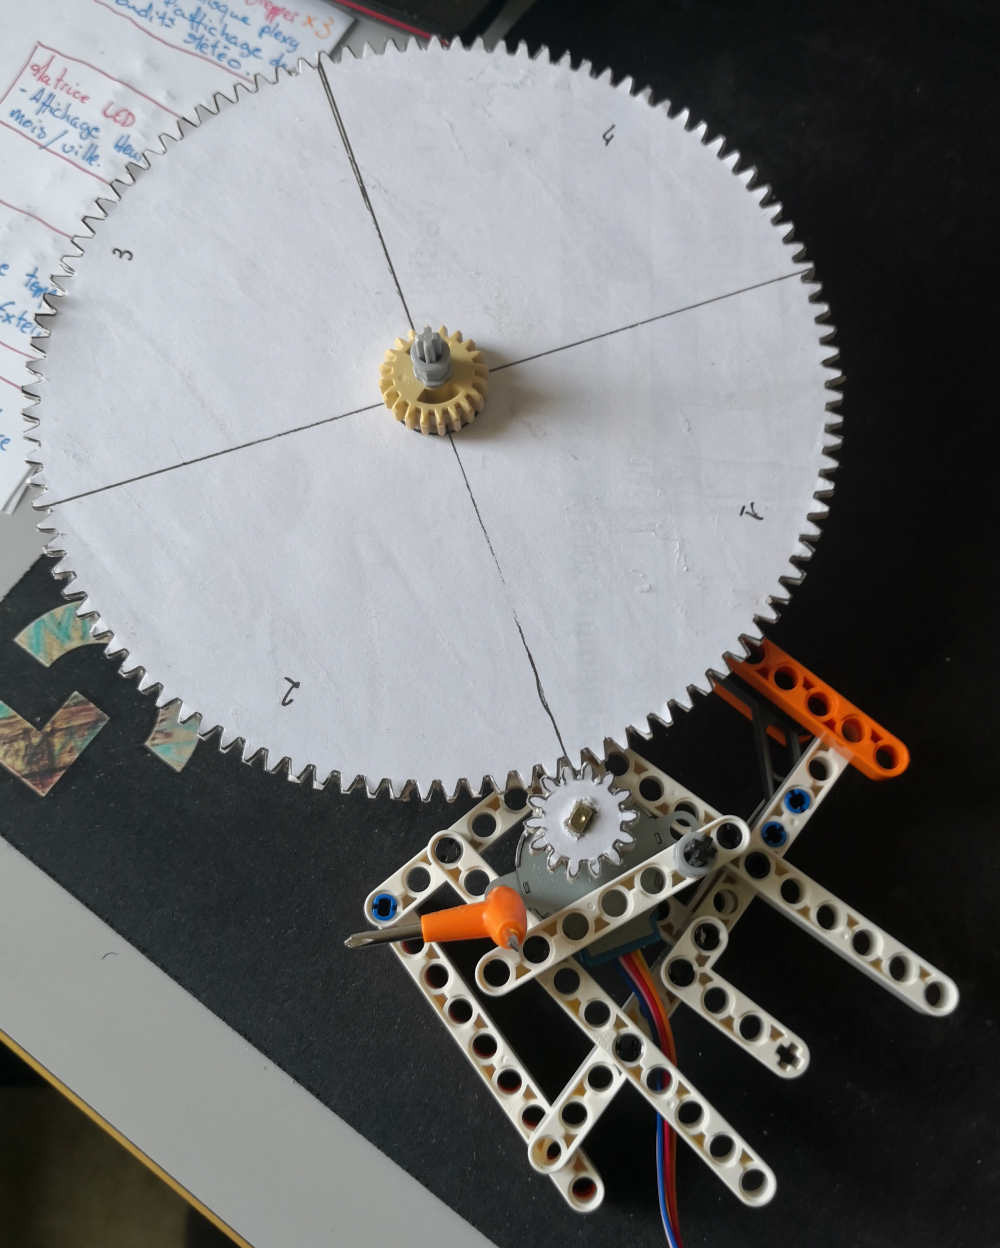
Coding time
Finaly i use the accel stepper & the fastled exemple i find to compose my dispaly code
This code put the display on a position & light the led depending on the weather information the arduino received.
#include

#define LED_PIN     5
#define NUM_LEDS    10
#define BRIGHTNESS  64
#define LED_TYPE    WS2811
#define COLOR_ORDER GRB
CRGB leds[NUM_LEDS];

#define UPDATES_PER_SECOND 100

#include "MyPal.h"

CRGBPalette16 SunPal = bhw4_044_gp;
CRGBPalette16 CloudPal = bhw4_009_gp;
CRGBPalette16 RainPal = bhw4_100_gp;
CRGBPalette16 Snowpal = bhw2_20_gp;

#include

// Motor pin definitions:
#define motorPin1  8       // IN1 on the ULN2003 driver
#define motorPin2  9      // IN2 on the ULN2003 driver
#define motorPin3  10     // IN3 on the ULN2003 driver
#define motorPin4  11     // IN4 on the ULN2003 driver

// Define the AccelStepper interface type; 4 wire motor in half step mode:
#define MotorInterfaceType 8

// Initialize with pin sequence IN1-IN3-IN2-IN4 for using the AccelStepper library with 28BYJ-48 stepper motor:
AccelStepper stepper = AccelStepper(MotorInterfaceType, motorPin1, motorPin3, motorPin2, motorPin4);

void setup() {

  Serial.begin(9600);

    delay( 3000 ); // power-up safety delay
    FastLED.addLeds(leds, NUM_LEDS).setCorrection( TypicalLEDStrip );
    FastLED.setBrightness(  BRIGHTNESS );
    fill_solid(leds, NUM_LEDS, CRGB(0,0,0));
    FastLED.show();
  // Set the maximum steps per second:
  stepper.setMaxSpeed(600);
  stepper.setAcceleration(200.0);
}

void loop(){
  if (Serial.available() > 0) {
    int weather = Serial.read();

    switch (weather){
      case 'a':
        fill_solid(leds, NUM_LEDS, CRGB(0,0,0));
        FastLED.show();
        stepper.runToNewPosition(0);

        colorwaves( leds, NUM_LEDS,SunPal );
        FastLED.show();
        FastLED.delay(20);
        break;
      case 'b':
        fill_solid(leds, NUM_LEDS, CRGB(0,0,0));
        FastLED.show();
        stepper.runToNewPosition(7680);

        colorwaves( leds, NUM_LEDS,CloudPal );
        FastLED.delay(20);
        FastLED.show();
        break;
      case 'c':
        fill_solid(leds, NUM_LEDS, CRGB(0,0,0));
        FastLED.show();
        stepper.runToNewPosition(15360);

        colorwaves( leds, NUM_LEDS,RainPal );
        FastLED.delay(20);
        FastLED.show();
        break;
      case 'd':
        fill_solid(leds, NUM_LEDS, CRGB(0,0,0));
        FastLED.show();
        stepper.runToNewPosition(23040);

        colorwaves( leds, NUM_LEDS,Snowpal );
        FastLED.delay(20);
        FastLED.show();
        break;

    }
}
}
void colorwaves( CRGB* ledarray, uint16_t numleds, CRGBPalette16& palette)
{
  static uint16_t sPseudotime = 0;
  static uint16_t sLastMillis = 0;
  static uint16_t sHue16 = 0;

  uint8_t sat8 = beatsin88( 87, 220, 250);
  uint8_t brightdepth = beatsin88( 341, 96, 224);
  uint16_t brightnessthetainc16 = beatsin88( 203, (25 * 256), (40 * 256));
  uint8_t msmultiplier = beatsin88(147, 23, 60);

  uint16_t hue16 = sHue16;//gHue * 256;
  uint16_t hueinc16 = beatsin88(113, 300, 1500);

  uint16_t ms = millis();
  uint16_t deltams = ms - sLastMillis ;
  sLastMillis  = ms;
  sPseudotime += deltams * msmultiplier;
  sHue16 += deltams * beatsin88( 400, 5,9);
  uint16_t brightnesstheta16 = sPseudotime;

  for( uint16_t i = 0 ; i < numleds; i++) {
    hue16 += hueinc16;
    uint8_t hue8 = hue16 / 256;
    uint16_t h16_128 = hue16 >> 7;
    if( h16_128 & 0x100) {
      hue8 = 255 - (h16_128 >> 1);
    } else {
      hue8 = h16_128 >> 1;
    }

    brightnesstheta16  += brightnessthetainc16;
    uint16_t b16 = sin16( brightnesstheta16  ) + 32768;

    uint16_t bri16 = (uint32_t)((uint32_t)b16 * (uint32_t)b16) / 65536;
    uint8_t bri8 = (uint32_t)(((uint32_t)bri16) * brightdepth) / 65536;
    bri8 += (255 - brightdepth);

    uint8_t index = hue8;
    //index = triwave8( index);
    index = scale8( index, 240);

    CRGB newcolor = ColorFromPalette( palette, index, bri8);

    uint16_t pixelnumber = i;
    pixelnumber = (numleds-1) - pixelnumber;

    nblend( ledarray[pixelnumber], newcolor, 128);
  }
}
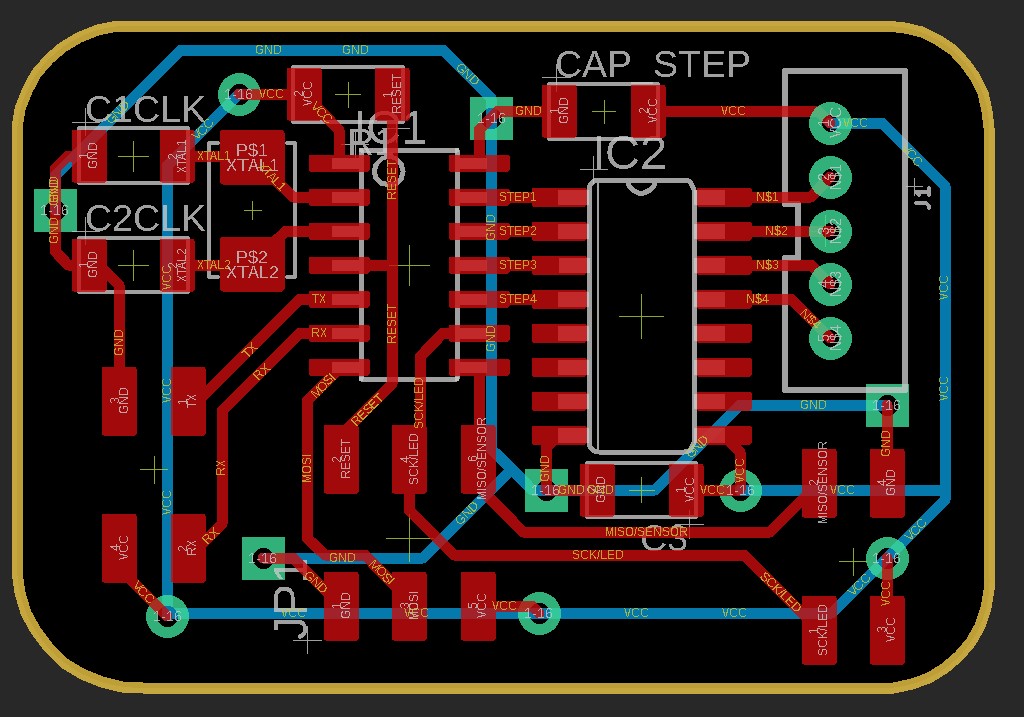
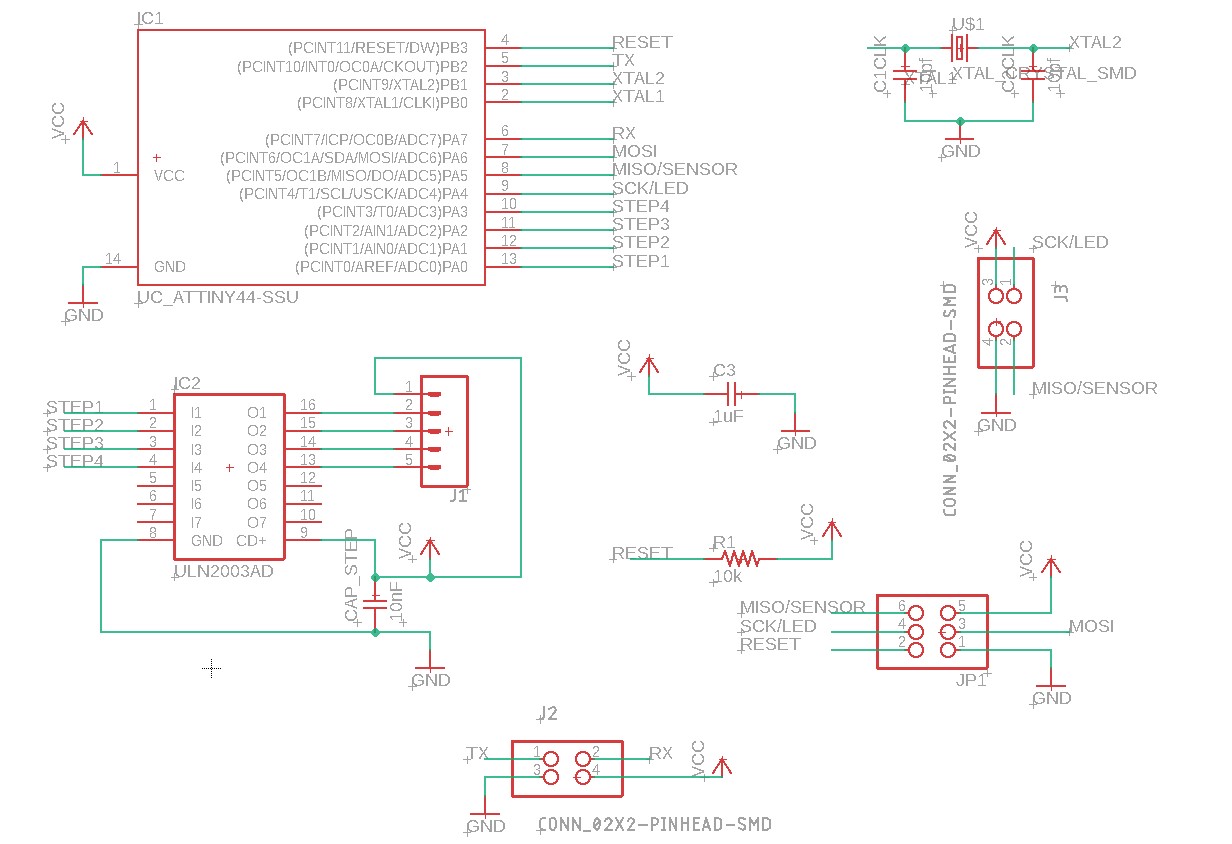
Last week i prepared the design for the board on eagle, but after programming i have to modify it by changing the ATTiny 44 by a ATTiny 1614 for have the space for all my programme.
A video of the setup working when i send different "weather" signal.
Group assignement:
On this group assignement i have to measure the power comsumption of an output device.
To do this i take one stepper & led board i produce for my Final project (more information Here)
I program this board to work when he received a signal from the Esp board, for measuring the power comsuption i remplace the Esp with a arduino sending a Serial signal.
I connecting the system on a power supply with the multimeter in serial like i show on this shem i draw:

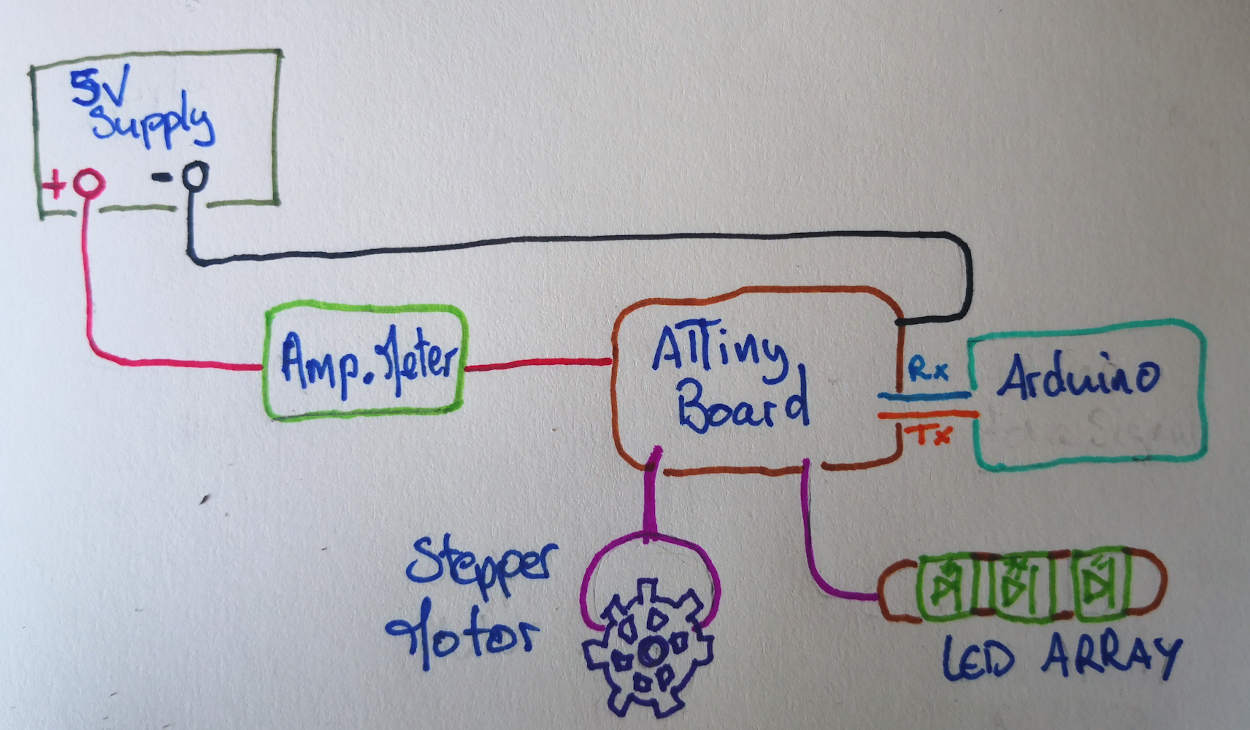
And let's go mesuring how many power the stepper & the led system need:
I could see the Attiny need 15.5 mA on the begining of the video, after start the stepper motor upping the consumption around 200 mA & when the LED array light up that add about 40 mA for the 3 RGB LED.